Finally, it is tulip time so bulb planting tools, dibbers or trowels at the ready.
November is the best time to start planting out tulip bulbs, as the temperatures start to cool. However, if you have not got your bulbs yet, it is not too late. A December planting will be fine, and I often plant out, right up until Christmas.
However, if the ground is frozen, I only plant the bulbs into pots and other containers.
I planted over 1200 new tulip bulbs last year and have a good number to plant this year too. So many beautiful varieties, I cannot resist adding yet more to brighten up the spring.
I have added links below for some previous tulip posts if you would like to look at some more of my tulips.
Time to choose beautiful tulips for spring
More beautiful tulips, planting for the spring.
Ok, bulbs at the ready and off we jolly well trot to do some planting.
Tulip time, grab those bulbs

Firstly, I have grabbed a handful of tulip bulbs as it is November and prime tulip time planting.
Clearly, the tulip bulbs need to be checked first, so here is one of my lovely helpful rescue hens, Rafaela, doing the honours.
One would think my lovely chickens would be content, as they featured in my last post, but clearly they must be in the limelight at all times!
Link below if you missed their recent post, having fantastic fun in the garden.
Gardening with chickens, more fantastic fun
So, let us get back to tulip time rather than chicken time if we can.
Actually, joking aside, it is best to check each bulb and discard any that are soft or mouldy.
Once Rafaela has given the all clear, it is time to plant the bulbs. I plant them in borders and also in pots and other planters.
Planting tulip time

I have chosen some wooden planters for a colourful tulip display.
The wooden planter above has had crocks added over the drainage holes and been filled with compost and grit. The addition of grit is ideal as this improves drainage. Tulips hate having soggy bottoms, well, wouldn’t we all!
Next, I spaced out the tulip bulbs to ensure each bulb had room to grow. Once happy, I made planting holes and popped them all in.
All tulip bulbs planted at the rule of two or three times the depth of the size of the bulb.
In addition, I could not resist adding a few iris reticulata and crocus bulbs at the front. These will flower before the tulips and give some fabulous early colour.
Furthermore, the crocus and Iris reticulata will help any early pollinators in February.
I have sown a few poached egg plant seeds in the front of a couple of the wooden planters to extend the colour into early summer.
Another fantastic flower for some bright zingy colour and for the pollinators.
Tulips in spring

After a long and dreary winter, it really is colourful tulip time in front of that boring shed each spring.
Purple Flag and Flaming flag are the stars of these wooden planters, giving some fantastic purple colour in my garden.
Also, the poached egg plants are peeping out at the front of the planters, awaiting their turn to bloom.
In addition to the fabulous colours of the tulips, the purples and blues are the most attractive to bees. Most attractive to me too, I adore purple flowers. Well, purple everything!
Since bees emerge after winter hibernation early in the year, they need a ready supply of food and tulips supply plenty of pollen. Therefore tulips are a good pollen bar for later, after the crocus and iris reticulata have finished flowering.
I love to see the tulips starting to bloom in the spring. Such a boost to wellbeing after the winter and a help for wildlife too.
Two fantastic reasons to have as many tulips as possible in garden borders, pots, courtyards and balconies.
More tulips for spring

I liked the new wooden planters so much, I decided to purchase some more.
Amazingly, three planters were exactly the right size to fill the gap in front of the shed. Additionally, they have given me extra planting spaces for dahlias and cosmos for the summer and autumn when the tulips die down and have a rest.
Naturally, the lawn in front of the shed has now become a grass path. Another large border was needed for all the tulips and dahlias and other flowers that I grow.
I am starting to sound like my dear friend the Cosmos Queen. She is always digging out new borders and will feature in a new post soon.
In the meantime, here is a link to the most recent post if you missed the Cosmos Queen’s last gardening escapade.
The awesome power of the garden
I believe my new border is about thirty feet long (I never get around to actually measuring it) so imagine how many new tulips I could fit in there!
Tulips and planters

I purchased my wooden planters from Amazon and have added a link below if you wish to check out some options. Some of the planters have now been in the garden for three years and they are all still looking great.
Amazon planter options https://amzn.to/3QJfp78
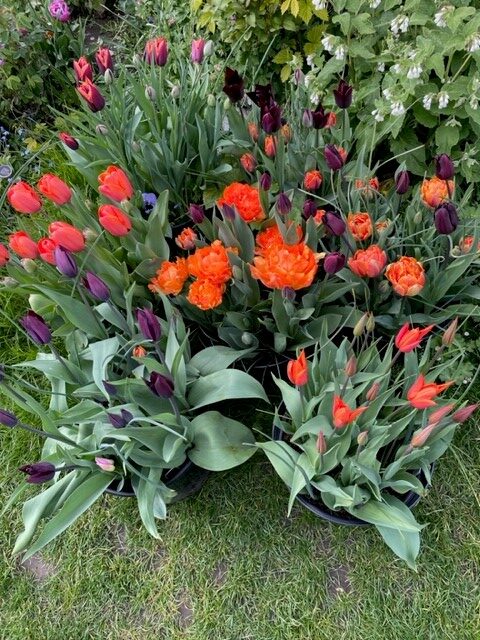
I also plant into tubs and a selection of some of my colourful tulips can be seen above, grouped in some pots for the photo.
An additional advantage of planting some into smaller pots is that you can move the displays around.
I shuffle mine around to get the most colourful displays near the house so they can be seen from indoors.
And of course, I always need more pots, containers and borders for new tulips.
With this in mind, here are some options if you need more tulips for your spring displays. J Parkers have purple and flaming flag if you fancy some purple beauties like mine.
Wow, there is a Purple Princess, a Purple Peony and so many more. Ok, before I list them all, here are some links.
Click here for J Parkers tulips
I hope you have enjoyed this tulip time post and will join me next time.
This blog is a participant in Amazon’s Associate’s Program, and an affiliate for J Parkers. If you click on one of these links above, and make a purchase I may receive a commission, at no additional cost to you.
To see all my updates as they happen, please enter your email address below and press the subscribe button.


